Build 18650 Li-On Battery Pack Yourself
In this project we're going to build a 18650 baterry pack that can be used for various appliances.
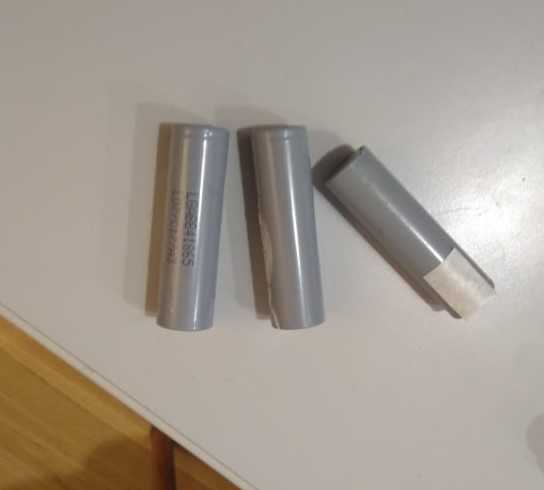
The idea for this project came to me when browsing the internet I stumbled upon this forum post where the guy was telling how he salvaged bunch of 18650 cells from an old laptop battery.
I then realized that I had one of those laying around somewhere as well. That old laptop battery itself was unusable because of battery protection module failure, but most of the cells were still in a good shape.
Today, I'm putting those cells to good use.
What's 18650 and why Li-On ? Pros and Cons
A 18650 battery is a li-on cell that’s 18mm x 65mm in size. It has nominal voltage of 3.6V and a capacity of 1800-3500 mAh. A modern standard of rechargeable batteries. These batteries are used in all kind of applications, because of their high energy density and high discharge and because they're light weight.
Now, it is important to note that discharging a li-on battery below 2.5V or overcharging above 4.2V might do permanent damage to it. Short circuiting or mechanically damaging the battery can even cause explosion or fires as lithium is highly reactive and flammable.
So to protect the the battery pack from overcharge, overdischarge and overcurrent, I always advise to use a battery management module (BMS). BMS also ensures that while charging the battery pack all the batteries are charged evenly.
I also highly suggest not to mix old (used) and new cells when building a li-on battery pack. This will reduce the overall performance of the pack. Thing is, the capacity of li-on cell diminishes after every charge cycle. Meaning an old battery cell will most likely have a lower capacity then originally advertised. When connected in series, the battery cell with a smaller capacity will get depleted faster, rapidly losing voltage and causing an imbalance of voltages across the cells.
Now the BMS negate this a little bit, but still battery cells with same capacity and same nominal voltages should be used when building a battery pack especially when you're connecting them in series.
Series vs Parallel
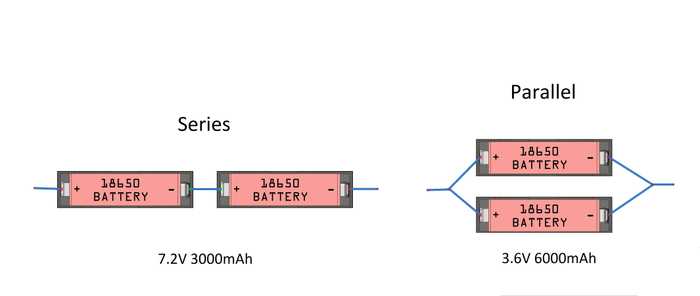
So when building a battery pack the cells can be connected in series (the voltage adds up) or in parallel (capacity adds up). Refer to the picture below. Assuming two 3.6V 3000mAh batteries are used :
So, for this project I'll use a 18650 battery holder to connect my 3 18650 battery cells in series which will give me a nominal voltage of 10.8V or 12.6V when fully charged (4.2V x 3) and capacity of 2600mAh
I strongly advise against trying to solder the batteries together unless you know how to spot weld and use a battery holder.
The parts
Alright, here's what we'll need:
- 3S 40A Li-ion Lithium Battery Charger Protection Board PCB BMS For 12.6V Lipo Cell Module ~ 2.5$
- 1X 2X 3X 4X 18650 Battery Holder ~ 1$
- 3pcs 2017 Liitokala NCR18650 3400mah Rechargeable Li-ion battery ~ 8$ for 3.
For charging the pack:
If you're going with step-down module, you'll need some sort of DC power supply and then step down the voltage to 12.6V and set current to 1-2A. This is done by adjusting the patentiometers on the module itself. Or you can opt for a 12.6V charger and solder the standard DC5.5 x 2.1mm connector to the BMS.
We will also need some wires, a soldering gun and some solder. I'll assume you have those already.
Building the battery pack
Before we start I'd like to explain the reason why I'm using 18650 battery holder. Making a battery pack means physically connecting batteries in some way. Majority of the tutorials I've seen suggests soldering batteries together using tab wire.
For a beginner, soldering 18650 li-on batteries together can be very tricky. At least with the regular soldering gun. If you're not careful enough, you might overheat the battery. Let's not take unnecessary risks and use cheap battery holder.
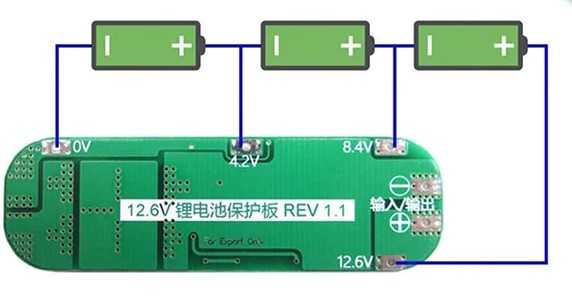
Now concerning the battery protection module, here's how it is supposed to be connected:
Looking at this schematic you can see that for BMS to function properly, extra wires have to be soldered between the battery cells.
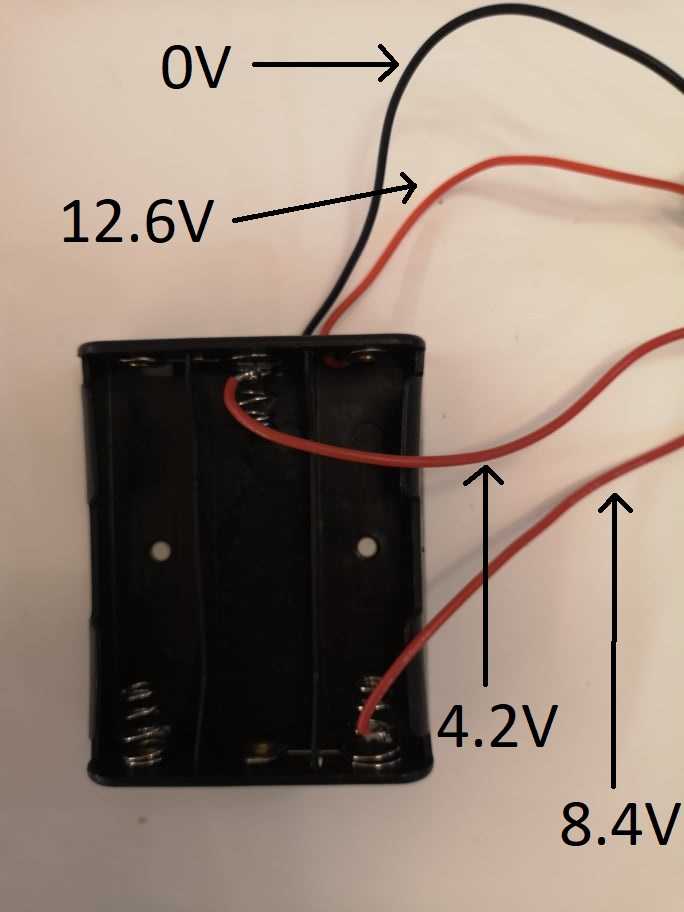
Here's how I suggest doing that if you're using the same battery holder as me.
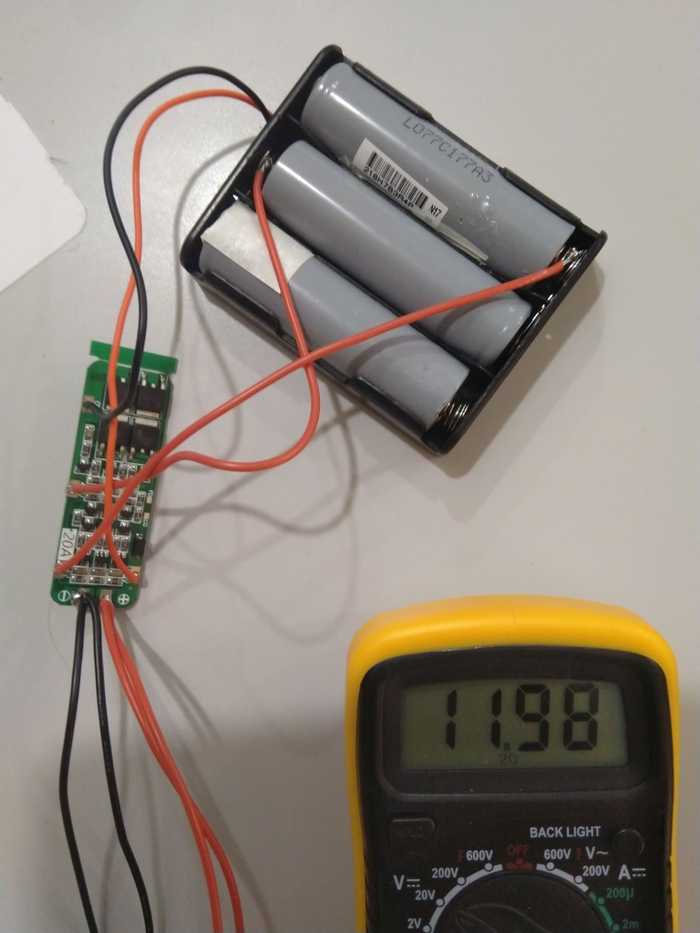
As you see, I simply soldered two extra wires to the springs of the battery holder. Just make sure you don't melt the holder itself.
Next, we're going to solder those wires to BMS and at the end everything should look something like this.
I also added two pairs of wires to the + and -. One pair is supposed to be used for the load and the second one for charging.
Now you can use some tape to wrap everything up.
Final remarks
One thing that I'd like to emphasize is that while charging such battery pack, a CV/CC (constant voltage/constant current) based charger should be used. Such charger limits the amount of current to a pre-set level until the battery reaches a pre-set voltage level. Don't try to charge li-on batteries with lead acid battery chargers. You can read more about charging li-on batteries here.
Anyways, that is all for now. Thanks for reading and good luck on your projects!
